Introduction
This document describes a process by which you can compare a list of host names generated from one or more sources against a list of systems currently managed by Tanium. Instead of manually searching Tanium System Status for individual machine names, you can utilize Microsoft Excel to perform the analysis and quickly extract a list of unmanaged (or managed) endpoints.
For example, you could export a list of computers from an Windows Active Directory container and compare it against a list of Tanium managed endpoints. This solution supports lists containing up to 1,048,756 rows (current limit of Excel workbook rows). By using Excel, these comparisons can be completed quickly and efficiently.
This process leverages an export of the Tanium System Status content and supports comparisons against the following criteria: Fully Qualified Domain Names (FQDNs); short names; or IP addresses. The Excel workbook utilizes variable names for sections of the Excel workbook and the formula uses VLOOKUP calls to perform the analysis. Once created, this workbook can be reused with future client data sets. You will simply need to export a current data set from Tanium System Status, and compare with your new data set.
Exporting and Formatting System Status Data
In order to export data from Tanium, you will need sufficient privileges to access the System Status page. If you cannot access the Main Menu à Administration à System Status page in the Tanium console, you will need to request access from a Tanium administrator.
1. Before exporting the data, ensure your user preferences are configured to export headers. In the upper righthand corner of the console, click on your username and select Preferences from the menu:
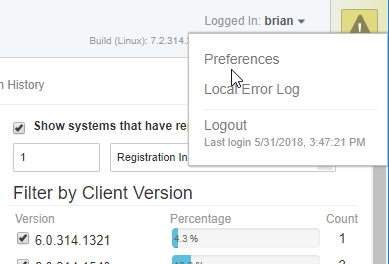
Figure 1. Tanium Console User Preferences
2. Check the box for “Copy/Export with headers by default”
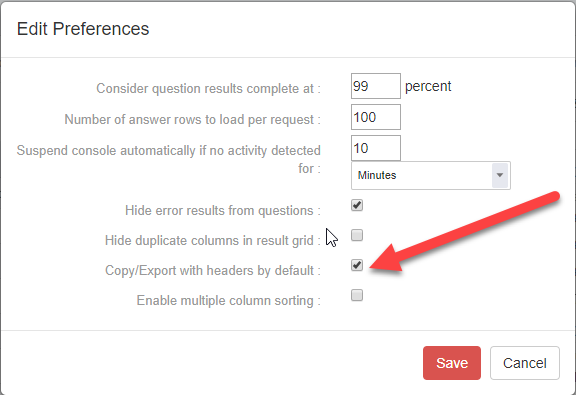
Figure 2. Enable Copy/Export with headers by default
3. Once on the System Status page, modify the filter on the right side of the console. Change the filters to “30” and “days” instead of the default of “1” “Registration Intervals (4 minutes)”.
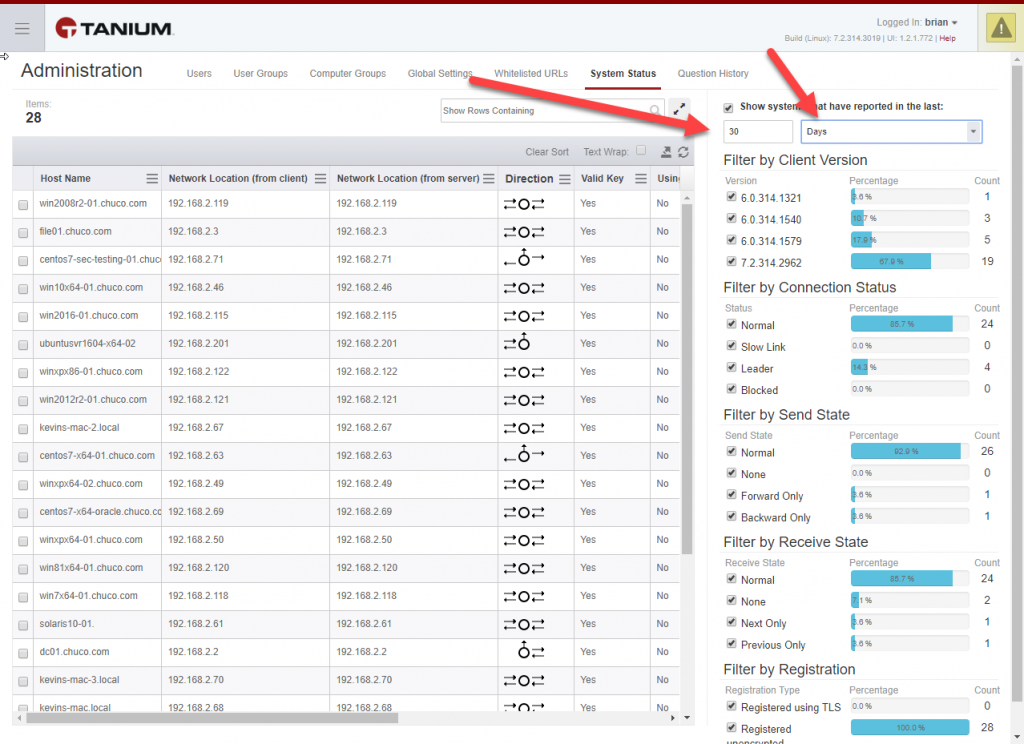
Figure 3. Modify the filter interval
4. Export the file as a .CSV file.
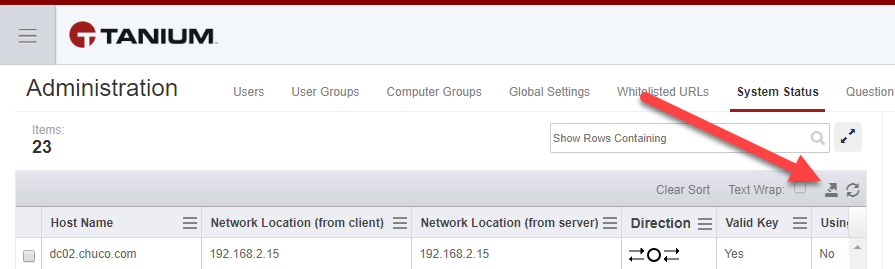
Figure 4. Export data as .CSV file
5. The export function will automatically name the file based on the time the export function was run. You can save the file with a different name.
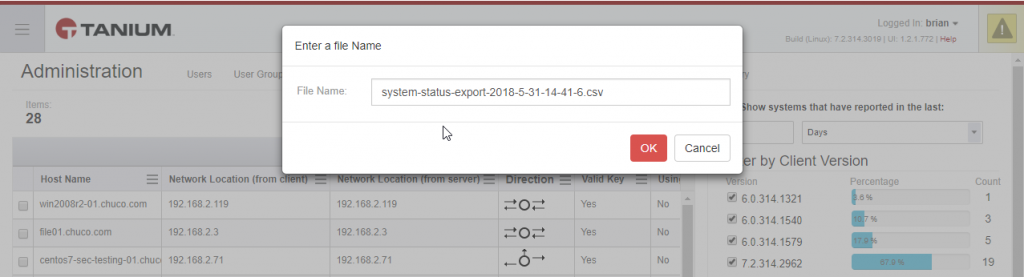
Figure 5. Export - File name Save As
6. The file will be downloaded via your browser. The .CSV file should be visible in your Downloads folder. Double-clicking the file should open it in Excel assuming Excel is installed on your workstation.
Once opened, immediately save the file as an Excel workbook (.xlsx extension)
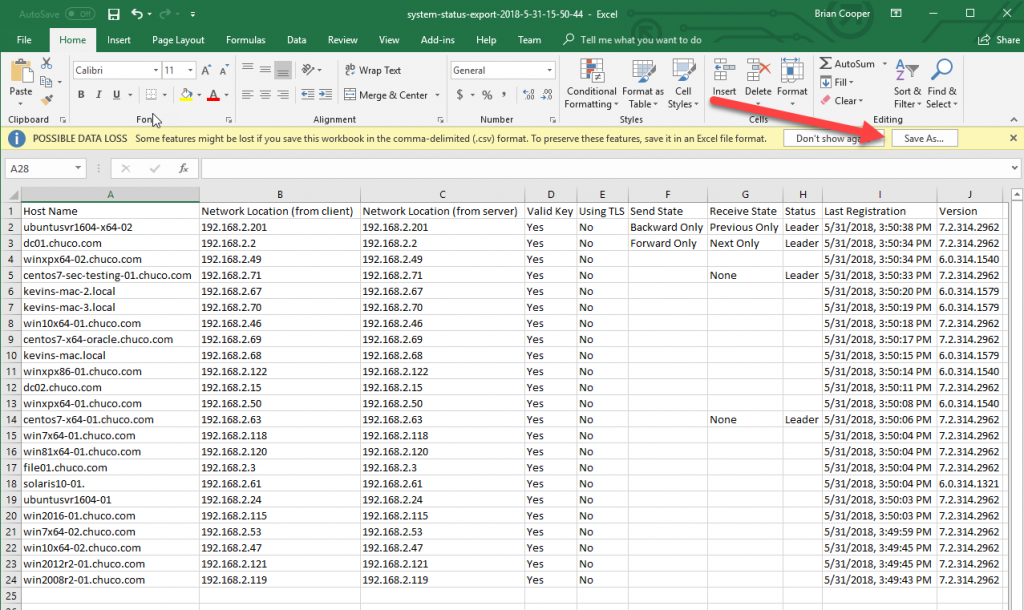
Figure 6. Open CSV file in Excel
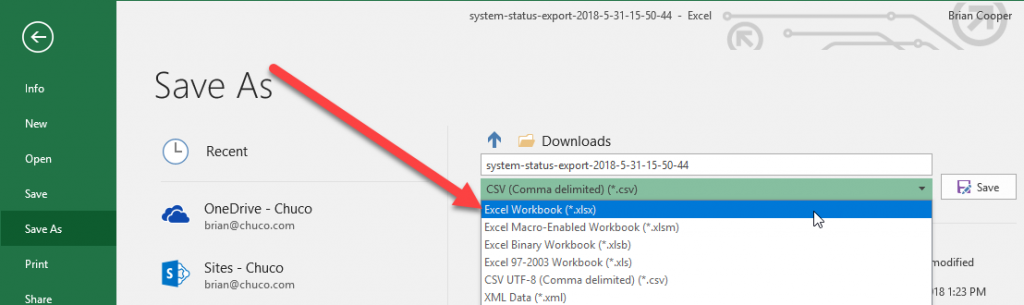
Figure 7. Save file as Excel Workbook (.XLSX)
7. Delete all columns after column C, leaving the Host Name, Network Location (from client), and Network Location (from server) columns.
8. Move column A (Host Name) to column D.
9. Create a new header for column A called “Short Name”
10. We need a method to pull to the host “short name” from the list of fully qualified domain names in column D. This formula will calculate the short name for each “Host Name” found in column D.
Copy the following formula into cell A2:
=IF(ISNUMBER(FIND(“.”, D2)), LEFT(D2,FIND(“.”,D2) – 1), D2)
11. Copy the formula all the way down for all remaining rows in column A.
Once completed, your worksheet should look like this:
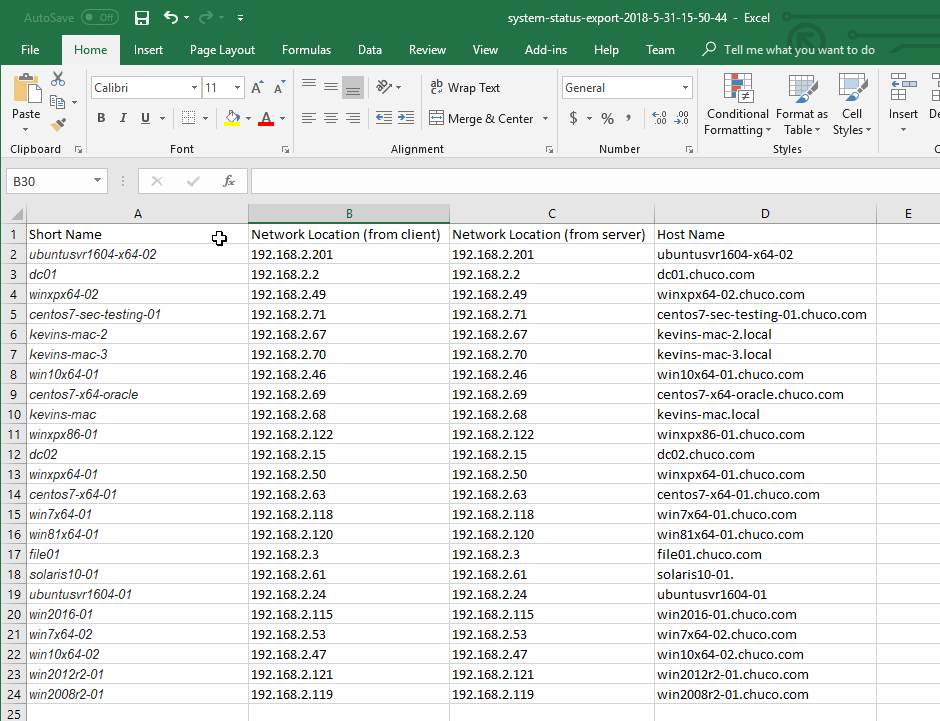
Figure 8. Insert Short Name Filter
12. Next, we will assign Excel names to sections of the worksheet. Once these sections are assigned names, they can be referenced by formulas on different worksheets of the workbook.
Highlight the entire table but exclude the header rows. In our example, cells A2 through D24 are selected. Once selected name the region REG_SHORT and press Enter to save the name.
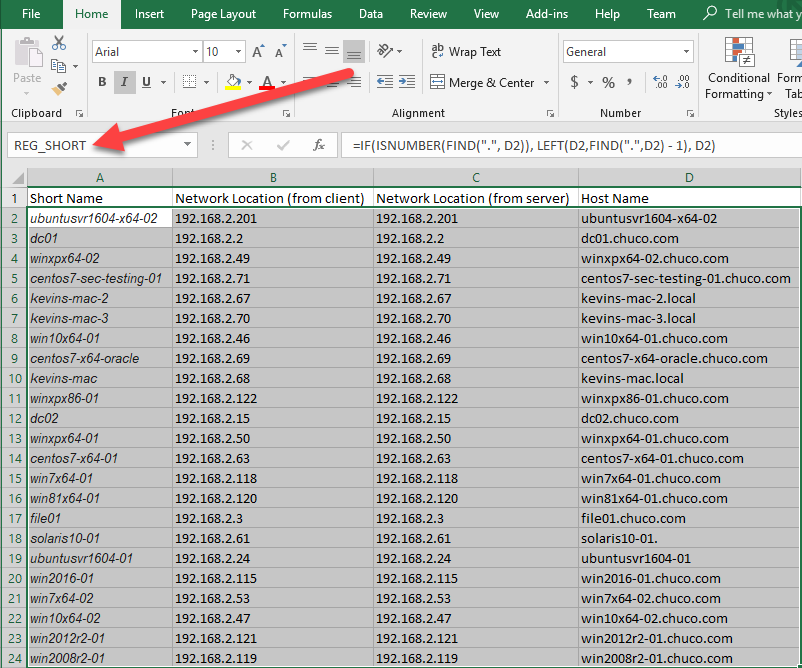
Figure 9. Worksheet Reference Assignment - REG_SHORT
13. We need to perform the same steps for 3 more worksheet regions. REG_CLIENT_IP will reference the range of cells in columns B through D. REG_SERVER_IP will be assigned to the data in columns C and D. Finally, the last section of data in Column D will simply be titled REG.
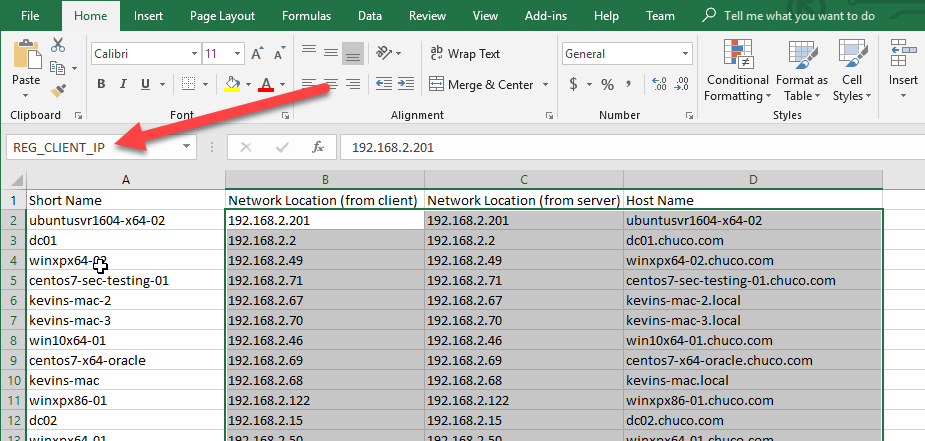
Figure 10. Worksheet Reference Assignment - REG_CLIENT_IP
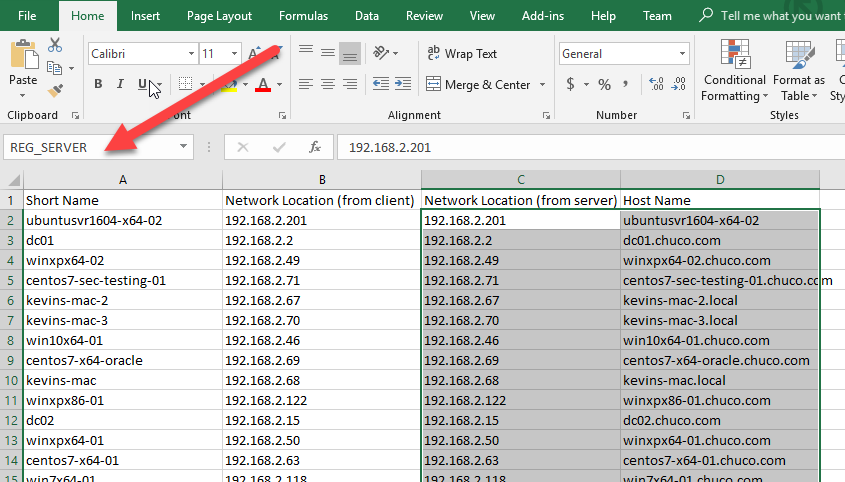
Figure 11. Worksheet Reference Assignment - REG_SERVER
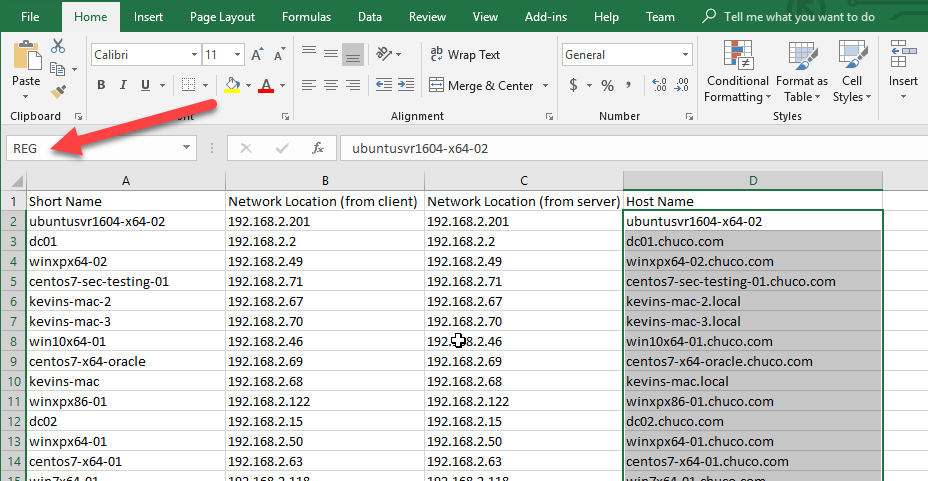
Figure 12. Worksheet Reference Assignment - REG
14. Save the workbook.
IMPORTANT: It must be saved as an Excel workbook. A CSV file will not support the formulas and multi-worksheet solution described in this document.
ADDING A LIST AND CHECKING NAMES
The section describes how to crosscheck lists of IPs, hostnames, and short names against the Tanium data we imported into our workbook.
Note: The data you import here could be from any source including:
- A list of systems from an Active Directory container (domain, site, organizational unit)
- A list of systems dumped from a DNS zone
A manually created list of systems - A list of IP addresses handed out by a DHCP server
- A list of systems from a query against an ITAM/ITSM system
Regardless of the data source, the data must be formatted consistently with one entry per line. You may need to format it before copying into Excel, or you could try importing the data directly into a worksheet and let Excel format it depending on the file delimiters.
Note: Do not mix and match data with different delimiter types in the same file. You can only specify one type of delimiter when importing a file into Excel. Excel will not prevent you from importing a mash up of different data types, but the data will not format correctly in Excel.
In the first example below, we’ll be using a list of short names.
SHORT NAME LOOKUP
1. Copy the list of names that you want to crosscheck. In the example below, a list of server names was manually generated. Only some of the servers in the sample list have a client. Using the named Excel ranges we created previously, we’ll create a formula to perform lookups against the short names we generated in Step 11 of the previous section.
In the example below, a small data set of short names and IP addresses has been imported into a second worksheet called Azure (to simulate a list of Azure based systems).
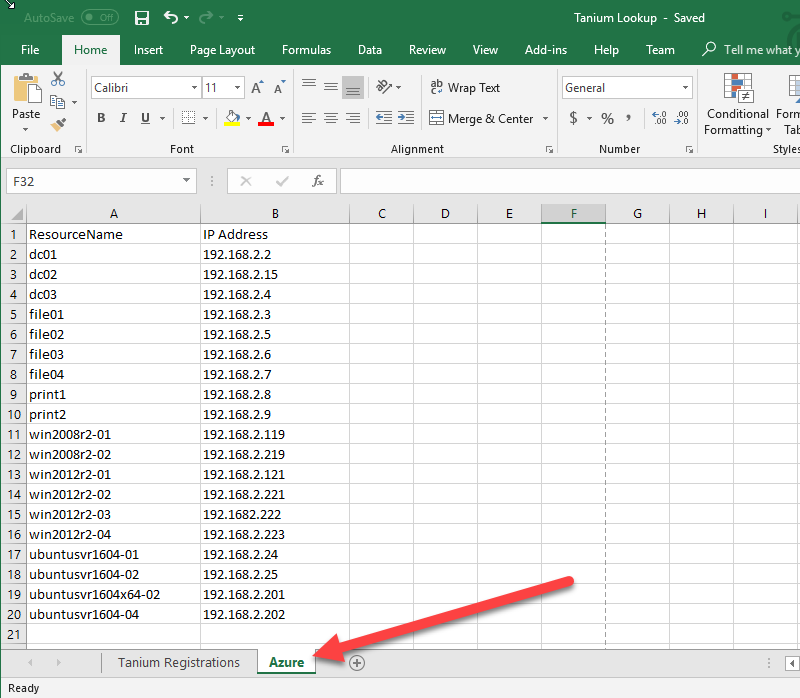
Figure 13. List of Azure Systems
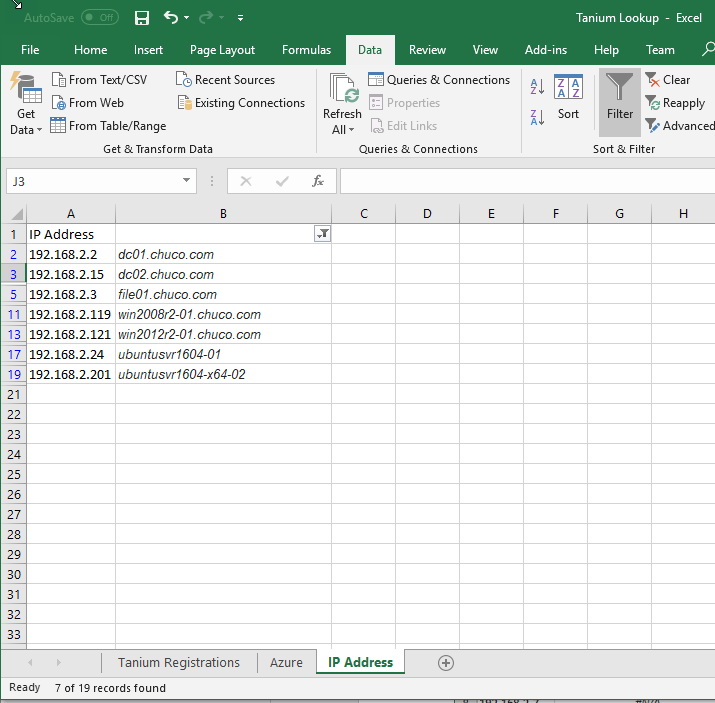
2. In this first example, we’ll performing a lookup of short names against our existing Tanium data. Cut the IP Address column and paste into Column A of a third worksheet. Call this third worksheet IP Address. We’ll be using this list of IP’s in the second example.
3. To perform the lookup of our imported data against the Tanium data, we will need to use a formula. Since the ResourceName data looks for short names, we will be looking for Clients using our REG_SHORT data that we created in Section 1. If they were IP addresses, we could use REG_CLIENT_IP and/or REG_SERVER_IP.
In column B, we perform the VLOOKUP calls. In cell B2, add this formula:
=VLOOKUP(A2, REG_SHORT, 4, FALSE)
Rows returned with an “#N/A” means the short name lookup was unsuccessful for that host name. If the lookup is successful, it will output the 4th column (that’s what the “4” is in the formula) in the REG_SHORT name range, which is the FQDN that Tanium has recorded (i.e., what the Computer Name Sensor outputs).
*NOTE: If the data source contained fully qualified names and you just wanted to check against Computer Names, you would run the VLOOKUP against REG and not REG_SHORT. If you use REG, you have to use “1” instead of “4”. If you use REG_CLIENT_IP, you would use “3”
4. Copy the formula from cell B2 all the way to the bottom of your imported data set.

Figure 14. Lookup Results
5. To quickly identify all systems that have a Tanium client, you can use the Excel data filter function.
A. Select the Data tab of the worksheet
B. Select column B so that it is highlighted
C. Select the Filter button.
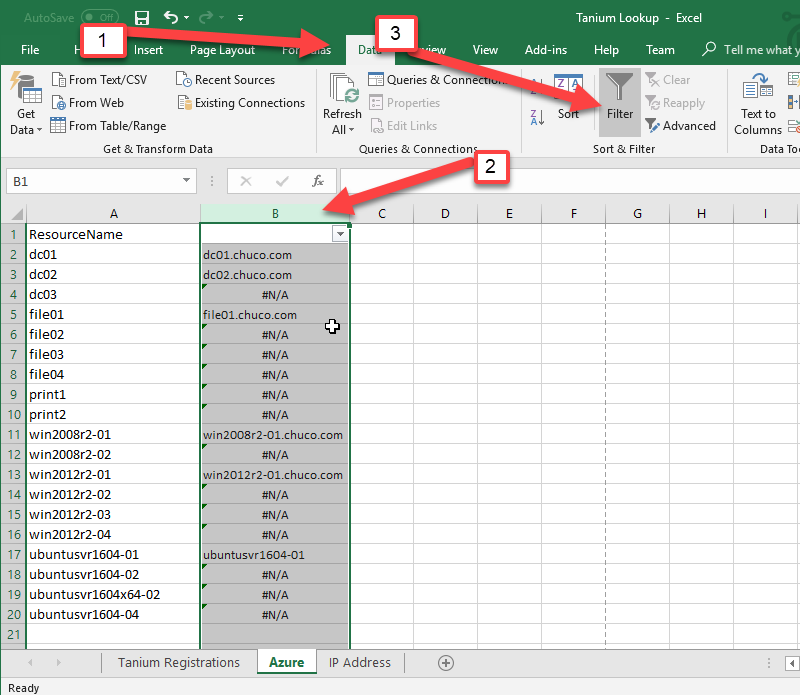
Figure 15. Selecting the data to filter
6. Select the filter button at the top of Column B. Clear the checkbox for #NA. Click OK. This will leave you with just the systems that have had active Tanium registrations in the last 30 days, in comparison with the list of systems you provided.
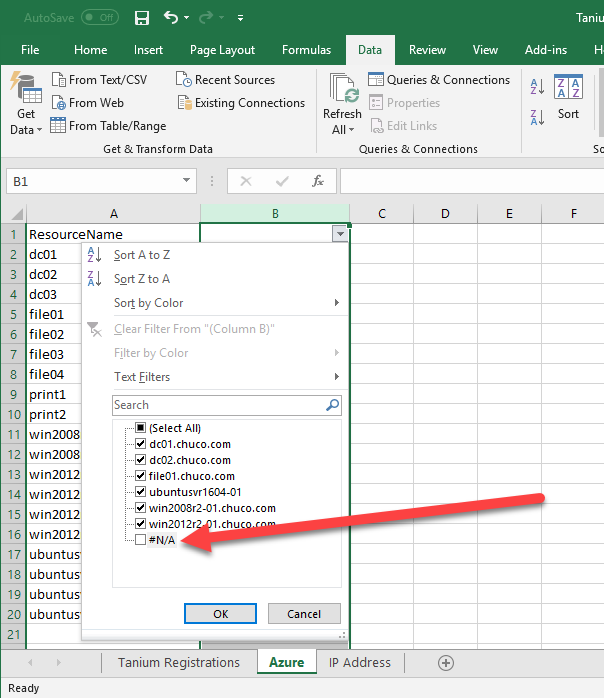
Figure 16. Exclude #N/A Results
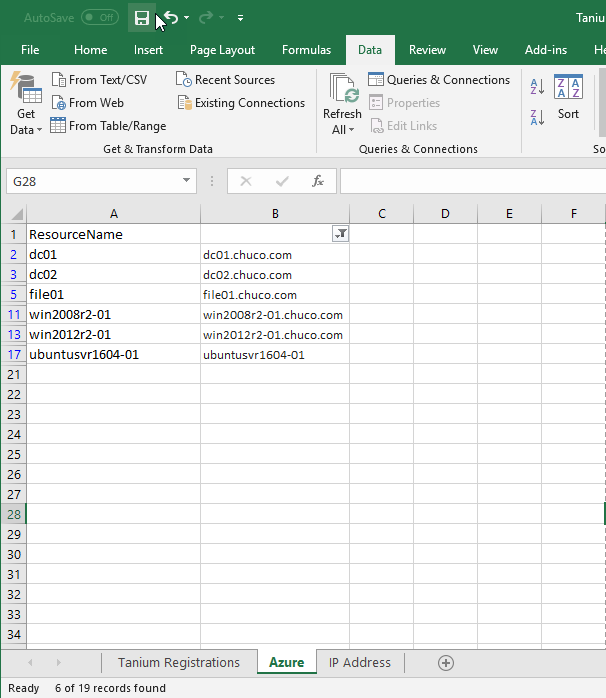
Figure 17. Filtered Results
In this case, we’ve found 6 Tanium Clients out of 19 Azure VMs.
If you need to send this end result to someone, the best way is to copy that list of output (with or without the #N/A) and paste just values into a new Excel document and send that, so none of the System Status or formulas get sent too.
IP ADDRESS/NAME LOOKUP
In the previous section, we saved the IP addresses from our original list to new worksheet in our workbook. We’ll be using the IP Address worksheet for this example. If you are performing this step from scratch with just a list of IP addresses, copy the list of IPs that you want to crosscheck. In the example below, a list of server names was manually generated. Only some of the servers in the sample list have a client. Using the named Excel ranges we created previously, we’ll create a formula to perform lookups against the IP addresses we defined as the REG_CLIENT_IP in step 14 of the previous section.
1. To perform the lookup of our imported data against the Tanium data, we will need to use a formula. Since the ResourceName data looks like short names, we’ll be looking for Clients using our REG_SHORT data that we created in Section 1. If they were IP addresses, we could use REG_CLIENT_IP and/or REG_SERVER_IP.
In column B, we’ll do the VLOOKUP calls. In cell B2, add this formula:
=VLOOKUP(A2, REG_CLIENT_IP, 3, FALSE)
If you see an “#N/A”, it means it wasn’t successful in finding the short name. If it finds a Client, it will output the 4th column (that’s what the “3” is in the formula) in the REG_SHORT name range, which is the FQDN that Tanium knows about (i.e., what the Computer Name Sensor outputs).
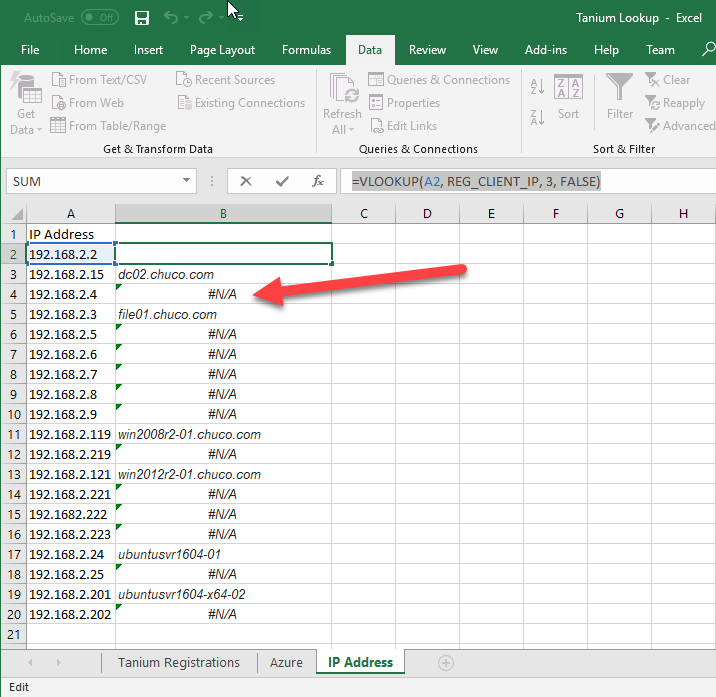
Figure 18. Lookup by IP Address